2026-04-10
Build your own Dobbie: the hardware guide
Want a Dobbie in your own kitchen? Here's the exact hardware we used: Raspberry Pi, touchscreen, microphone, and a few optional extras.
Dobbie lives in the kitchen on a Raspberry Pi. If you want to build your own, here's exactly what we used.
Required hardware
Raspberry Pi 4 Model B
The brain of the operation. A Pi 4 with 4GB RAM is plenty. You can find these at most electronics suppliers or via raspberrypi.com.
Touchscreen
GeeekPi 9 Inch LCD Touch Screen, 1280x720 HD Capacitive, HDMI + USB Touch
Clean 9-inch display, capacitive touch, connects via HDMI and USB. No drivers needed on Raspberry Pi OS. This is what powers the tap-to-talk interface.
Microphone
MillSO Mini USB Microphone, Omnidirectional Condenser, 2m cable
Plug-and-play USB mic. Small, unobtrusive, works out of the box on Pi OS. Dobbie uses this for the tap-to-talk voice input.
Optional but handy
Sound
USB Powered Computer Soundbar, 3.5mm Aux Input
Not strictly needed, but it makes Dobbie's responses feel more alive when spoken aloud. USB powered, slim form factor, fits nicely under or beside the screen.
Cooling
Raspberry Pi 4 Case with Dual Fan and Aluminium Radiator
The Pi 4 runs warm under continuous load. A proper case with active cooling keeps things stable, especially if Dobbie is running 24/7.
Setup helpers
- USB keyboard (for initial setup)
- USB mouse (for initial setup)
Once everything is configured, you won't need these anymore. Borrow them from a drawer.
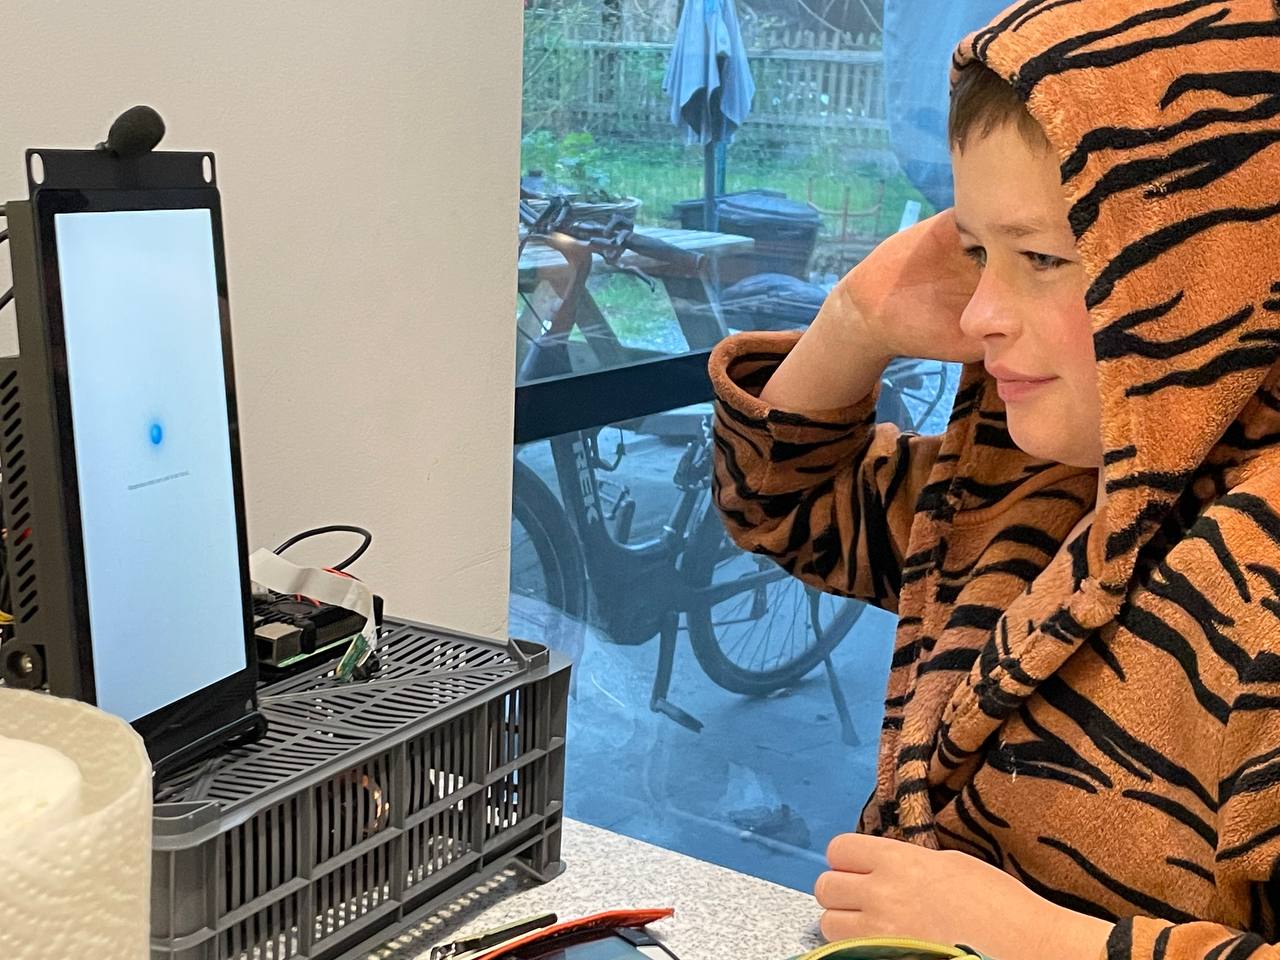
Enclosure: work in progress
The current setup is functional but raw. As you can see in the photo below, the Pi and cables are sitting in a plastic crate on the kitchen counter. It works, but it's not exactly interior design.
The plan is to 3D print a proper enclosure: something that holds the screen, hides the Pi and cables, and looks good on a kitchen counter. Two problems: no 3D printer, and no experience designing enclosures for 3D printing.
If you have experience with 3D modelling or printing and want to help, get in touch. This is an open problem. 🧦
Software
The software side consists of two parts:
- The frontend - a React application running in Chromium in kiosk mode, showing the clock, weather, shopping list, and the tap-to-talk button
- The backend - a Node.js/Express server handling voice transcription (Whisper), AI responses (OpenClaw), shopping list sync, and weather data
Full setup instructions and source code coming soon.
What it looks like
Curious what the finished result looks like? Check out Dobbie's kitchen screen for screenshots of both the day and night view.
Written with assistance from Dobbie, Frederik's AI assistant.